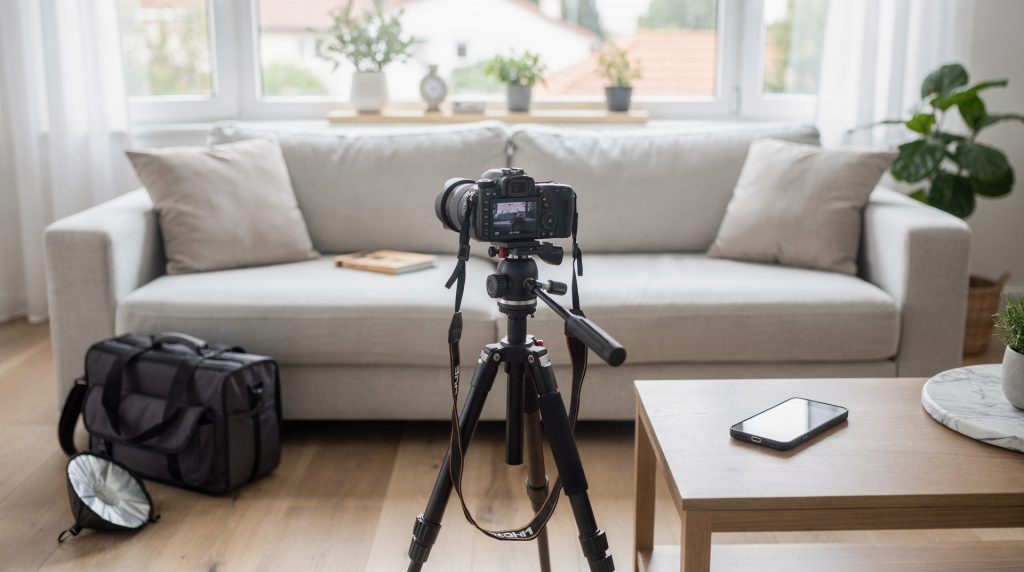
Real estate photography is never just about recording what a room looks like. It’s the first, and often only, chance to shape a buyer’s emotional expectation before they walk through the door. The decision to hire a professional or pick up the camera yourself isn’t a simple binary of good versus bad. It’s a strategic question: what kind of visual story does this specific property demand, and what is the real cost—in money, time, and credibility—of telling that story well?
For many agents, the practical question isn’t “Which is better?” but “Which approach is appropriate for this listing, and what trade-offs am I willing to accept?”
Why listing photos matter more than most agents think
Photographs do far more than document square footage. They set the psychological stage. A well-crafted image can make a space feel expansive, serene, and full of possibility; a careless one can shrink it, muddy the light, and quietly erode trust. Buyers scroll through dozens of listings in minutes, and their decision to click, save, or schedule a showing is driven almost entirely by how those first few frames make them feel.
This is why real estate photography isn’t just a technical chore. It’s a form of visual storytelling. Every frame either reinforces the narrative of a desirable home or undermines it. The way light wraps around a kitchen island, the sightline from a doorway into a sunlit living room, the texture of hardwood floors leading toward a staircase—these details aren’t accidents. They’re compositional choices that guide the eye and build a sense of place. When agents treat listing photos as mere documentation, they miss the opportunity to let the home speak with clarity and confidence.
Professional vs DIY Real Estate Photography: the core difference
A professional brings more than a good camera. They arrive with an understanding of how focal length affects spatial perception, how to balance ambient and artificial light so that a room feels cohesive rather than patchy, and how to keep vertical lines true so the architecture reads as stable and intentional. Their editing is precise: exposure, color balance, and lens corrections are applied to enhance reality, not distort it.
A DIY approach can absolutely produce usable images, but the outcome depends heavily on the shooter’s visual literacy. Someone who has trained their eye—perhaps through portrait or fine art work—may instinctively find strong compositions and manage mixed lighting. Without that background, the results often feel uneven. One corner of a room might look inviting while another appears cramped and shadowed. The real gap is consistency. A professional repeats a high standard across every room and every listing. A DIY shooter might capture two or three strong frames and then lose the thread, leaving a set that feels disjointed and visually anxious.
When professional real estate photography is worth it
Hiring a pro makes the most sense when the listing needs to compete in a crowded market or when visual presentation directly influences perceived value. In these scenarios, the fee is not an expense but a positioning tool.
Best cases for professional photography
- Mid- to high-value listings where presentation can accelerate buyer urgency and justify the asking price.
- Luxury homes, where detail, mood, and precision carry disproportionate weight. A chandelier’s sparkle, the grain of marble, the fall of light across a grand foyer—these moments require control.
- Properties with challenging light: dark interiors, small windows, or rooms that face away from the sun. A professional knows how to layer exposures and use off-camera flash to open up shadows without flattening the space.
- New listings that need a strong launch-day impact. The first 48 hours online are critical, and weak images can stall momentum before it starts.
- Agents who want to protect their time and brand. A professional shoot removes the burden of learning camera settings, culling hundreds of frames, and editing late into the night.
For a standard home, professional shoots typically run between $150 and $350 and deliver 20 to 40 edited images within 24 to 48 hours. That investment often pays for itself by reducing days on market and presenting the property as move-in ready from the very first glance.
When DIY real estate photography can make sense
DIY isn’t a compromise when it’s chosen for the right reasons. It can be the smart move for lower-stakes listings, tight budgets, rental properties, or situations where speed outweighs polish. It also makes sense for agents who are actively building their visual skills and want to understand composition and light before outsourcing entirely.
Best cases for DIY photography
- Lower-priced listings where the marginal return on a professional shoot is harder to justify.
- Rental or temporary listings that will cycle quickly and don’t require an emotional pull.
- Vacant homes that are easy to light and frame, with no furniture to complicate sightlines.
- Quick-turn properties that must go live immediately and can’t wait for a photographer’s schedule.
- Agents who are deliberately practicing their eye, treating each shoot as a learning exercise before committing to a professional workflow.
The danger with DIY isn’t the method itself—it’s the underestimation of how much room preparation, angle selection, and restrained editing affect the final image. A phone camera in the hands of someone who understands light and geometry can produce honest, appealing photos. The same device in hurried hands often yields frames that feel cluttered, distorted, and visually confusing.
Side-by-side comparison
| Factor | Professional photography | DIY photography |
|---|---|---|
| Upfront cost | Higher, usually paid per shoot | Lower, especially if gear is already owned |
| Time investment | Low for the agent; the photographer handles shooting and editing | High; shooting and editing demand hours of focused work |
| Consistency | Strong across listings; a repeatable process ensures every room reads well | Depends on skill and practice; quality can swing from room to room |
| Lighting control | Better managed; mixed light is balanced, shadows are opened intentionally | Often uneven or improvised; color casts and harsh contrasts are common |
| Image quality | Polished and market-ready; straight lines, accurate color, clean composition | Can be good, but often inconsistent; distortion and exposure issues creep in |
| Best for | Competitive listings, luxury properties, time-sensitive launches | Budget-sensitive or low-stakes listings, quick turnovers, skill-building |
What professionals do differently
The difference isn’t just the gear. It’s a systematic way of seeing and solving visual problems before they appear in the frame. Professionals treat each room as a small exhibition, where every element either supports the composition or becomes a distraction.
They prep the property first
A successful shoot begins long before the shutter clicks. Decluttering isn’t just about tidiness; it’s about removing visual noise so the eye can travel naturally through the space. Countertops are cleared, cords are hidden, and furniture is arranged to create clear sightlines. In a living room, that might mean pulling a chair slightly away from a window to let the daylight define the edge of the room. In a kitchen, it means removing magnets from the fridge and tucking away small appliances that break the visual rhythm. The goal is a frame where nothing competes for attention with the architecture itself.
They manage light instead of fighting it
Light is the primary medium of architectural photography. Professionals open blinds and curtains to invite daylight, but they also know when to diffuse it or supplement it. They balance interior lamps with window light so that one side of the room doesn’t read warm and yellow while the other turns cool and gray. This color consistency is subtle but powerful—it makes a space feel coherent and calm. When natural light is scarce, they use flash or LED panels strategically, often bouncing light off ceilings or walls to avoid harsh shadows and preserve the room’s natural modeling.
They protect vertical lines
Straight walls and doorframes are non-negotiable. When verticals converge or bow, the room feels unstable, as if it’s collapsing inward. Professionals use a tripod, set the camera at a height that keeps lines true—usually around chest level for most rooms—and frame carefully to avoid tilting the lens up or down. In post-production, they apply lens corrections to remove any remaining distortion. This isn’t about technical perfectionism; it’s about honoring the architecture and giving the buyer a sense of solidity and order.
They edit without misrepresenting
Editing should clarify, not deceive. Professionals adjust exposure so windows aren’t blown out and shadows retain detail. They correct white balance so whites read as white, not cream or blue. They may remove a temporary blemish—a stray leaf on the floor, a reflection in a mirror—but they won’t alter structural elements or replace an overcast sky with a sunset. That line matters because trust is the currency of a listing. When a buyer walks in and the home matches the photos, confidence grows. When it doesn’t, the entire showing starts from a place of disappointment.
Common DIY mistakes that hurt listing performance
Most DIY failures trace back to a handful of repeated habits, many of them rooted in a misunderstanding of how the camera translates three-dimensional space into a two-dimensional frame.
- Shooting too high or too low, which distorts proportions and makes ceilings feel oppressive or floors unnaturally sloped.
- Ignoring natural light and relying on mixed overhead fixtures, which creates patchy color temperatures and unflattering shadows.
- Forgetting to open blinds and curtains, turning a potentially bright room into a dim, closed-in box.
- Standing in the middle of the room instead of using corners or doorways to create depth and lead the eye through the space.
- Using a wide-angle lens carelessly, stretching edges so that furniture looks warped and rooms appear unnaturally elongated.
- Posting too many weak images instead of curating a smaller, stronger set. A listing with 40 mediocre photos feels overwhelming; one with 20 intentional images feels curated.
- Over-editing in ways that misrepresent the property—boosting saturation until grass glows neon, or smoothing walls so aggressively that texture disappears.
Perhaps the most fundamental error is assuming the camera will fix a poorly prepared room. It won’t. The lens magnifies clutter, exaggerates crooked blinds, and punishes half-hearted staging. The room must do its part before the camera can do its.
If you want to DIY: the practical baseline
DIY only works well when the process is disciplined and the shooter respects the same principles a professional would. The following checklist isn’t a shortcut; it’s the minimum foundation for images that feel intentional rather than accidental.
DIY real estate photography checklist
- Clean every room thoroughly—surfaces, floors, mirrors, windows.
- Remove clutter, bins, pet items, visible cords, and anything that pulls focus from the architecture.
- Open blinds and curtains fully to maximize natural light and create a sense of openness.
- Turn on lights only when they help the image stay consistent; if a lamp introduces a strong yellow cast, consider turning it off.
- Shoot during the brightest part of the day for interiors, when daylight is most even and forgiving.
- Use a tripod to keep lines level and allow slower shutter speeds if needed.
- Frame from corners or doorways to create depth and show the relationship between spaces.
- Keep the camera roughly at chest height or slightly lower, depending on the room—higher for kitchens to show countertops, lower for living rooms to emphasize volume.
- Take multiple angles per room, varying your position and composition.
- Edit exposure, white balance, and straight lines carefully; crop out distractions at the edges.
Suggested DIY gear minimum
- A camera with manual controls or a capable smartphone that allows exposure and white balance adjustments.
- A wide-angle lens if using a dedicated camera—something in the 16–24mm range (full-frame equivalent) to capture space without extreme distortion.
- A sturdy tripod.
- Basic editing software for brightness, color correction, and perspective straightening.
Step-by-step workflow for a DIY shoot
1. Walk the property first
Before you unpack any gear, walk through the entire home with the camera at your side. Notice where the light falls at that time of day. Identify the cleanest angles—the ones that show flow from room to room rather than dead-end walls. Make mental notes of problem areas: a dark hallway, a cluttered corner, a window with an unappealing view. Decide which three or four rooms will carry the listing and prioritize them.
2. Prep each room
Remove visual noise. If a room feels busy in person, it will feel chaotic in a photograph. Straighten furniture, fluff pillows, hide trash cans, and clear countertops. Pay special attention to reflections: mirrors and glass doors can double clutter if you’re not careful.
3. Set exposure and white balance
Don’t let the camera guess the mood of the room. Lock in a white balance setting that matches the dominant light source—daylight, for instance, if you’re relying on window light. Set exposure so that windows retain some detail without plunging the interior into darkness. If your camera or phone allows, bracket exposures and blend later for a more balanced result.
4. Shoot multiple frames
Work each room from at least two or three positions. Try a corner shot that shows two walls and a slice of the next room. Try a doorway shot that frames the space like a vista. Slight shifts in camera height or angle can dramatically change how spacious a room feels. Give yourself options for the edit.
5. Edit with restraint
Correct brightness, straighten verticals, and unify color temperature across the set. Avoid the temptation to replace skies, remove permanent fixtures, or saturate colors beyond what the eye would naturally see. The goal is a clean, honest representation that makes the home look its best—not a fantasy version that sets up a letdown.
A simple decision framework
Before choosing between professional and DIY, ask yourself these questions:
- Is this listing competitively priced or visually important to my brand?
- Will weak photos hurt the launch or slow down inquiries?
- Do I have the time to shoot and edit properly, or will this cut into higher-value activities?
- Is the property difficult to light—deep rooms, few windows, mixed color temperatures?
- Do I already have the gear and the trained eye to do this well, or am I hoping for the best?
If the answer to most of these questions leans toward “yes, this matters,” a professional is almost always the safer investment. If the property is straightforward, the budget is genuinely tight, and you’re confident in your ability to execute the basics with discipline, DIY can be a reasonable path.
Cost vs value: what agents should really compare
The real comparison isn’t simply the shoot fee versus zero. It’s the shoot fee versus the cost of slower interest, weaker engagement, and a listing that doesn’t present its best self. A professional fee of $150 to $350 is modest when measured against the potential of a faster sale, a stronger offer, or simply the preservation of your reputation as an agent who presents properties with care.
DIY can save money upfront, but poor photos often exact a hidden toll: fewer clicks, fewer showings, and more days on market. In visual culture, the first impression is rarely reversible. A buyer who scrolls past a poorly lit, distorted image may never return, even if the home itself is wonderful. That’s a cost worth factoring into the decision.
Best practices for better results either way
Whether you hire a professional or shoot it yourself, certain principles hold true across every successful listing.
- Start with clean, staged rooms that let the architecture breathe.
- Use natural light as your primary source whenever possible; it feels more inviting and honest.
- Keep verticals straight—this alone separates amateur from intentional work.
- Show the flow of the home, not just isolated corners. Let one room lead visually into the next.
- Choose fewer, stronger images over a large set of average ones. A curated gallery tells a clearer story.
- Edit for realism, not fantasy. The goal is to present the home at its best, not to invent a different one.
FAQ
Is professional real estate photography always worth it?
No. It’s most valuable when presentation directly affects buyer interest, price perception, or speed to market. For a low-stakes rental or a property that will sell quickly regardless, the return on that investment may not be there. The key is to match the method to the property’s role in your portfolio.
Can a smartphone be enough for DIY real estate photos?
Yes, for simple listings and disciplined shooters. Modern smartphones have wide lenses and capable editing tools. But the results depend heavily on lighting, framing, and post-processing skill. A phone in the hands of someone who understands composition and light can produce clean, honest images. In hurried hands, it will amplify every mistake.
How many photos should a listing have?
Zillow recommends posting the 20 best photos to a listing. That number isn’t arbitrary—it’s enough to show the home’s narrative without overwhelming the viewer. A tight edit of strong images always outperforms a sprawling gallery of mediocre ones.
What is the biggest DIY mistake?
Poor lighting and crooked lines. These two issues alone can make a listing feel unpolished and untrustworthy. When a room is dark or the walls appear to lean, buyers subconsciously question the care taken with the property—and by extension, the listing itself.
Should you edit real estate photos heavily?
No. Edit for clarity and accuracy, not to misrepresent the home. Adjust exposure, white balance, and perspective. Remove temporary distractions if needed. But avoid altering structural reality or creating a mood that doesn’t exist. Trust is the foundation of any showing, and it starts with the photos.
Conclusion
Professional real estate photography is the stronger choice when a listing needs to compete, impress, and convert attention into showings. It brings consistency, visual intelligence, and a polished narrative that respects both the architecture and the buyer’s expectations. DIY can work for simpler properties and tighter budgets, but only when the shoot is planned with the same discipline a professional would apply—thoughtful light, straight lines, intentional composition, and restrained editing.
The best approach isn’t ideological. It’s strategic. Match the method to the property, and let the photos do the work of selling the space before anyone walks through the door. In the end, every frame is a choice about how you want that home to be seen and remembered.