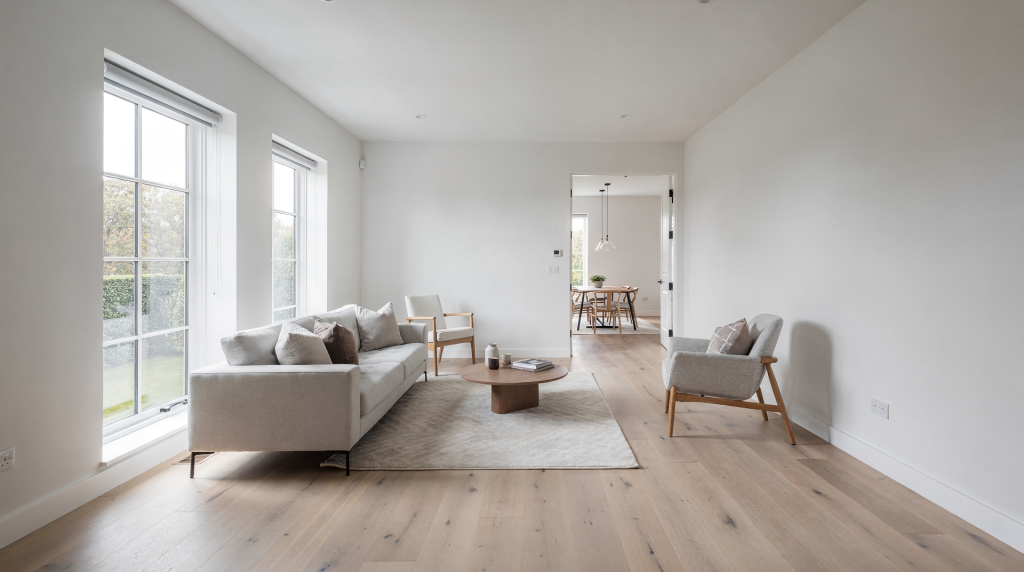
A wide-angle lens does more than cram an entire room into a single frame. It shapes how a buyer reads the space—whether the living room feels airy and connected or distorted and untrustworthy. In real estate photography, the focal length you choose becomes a visual narrator: it can guide the eye through an open floor plan, emphasize the relationship between a kitchen island and the dining area, or quietly exaggerate proportions until the image stops feeling like the home someone actually walked through. The difference between a photograph that sells a property and one that raises quiet suspicion often lives in how the wide angle is handled.
Why wide-angle lenses matter in real estate photography
Real estate images carry a specific burden: they must communicate both atmosphere and function in a single glance. A potential buyer scrolling through a listing isn’t mentally stitching together a sequence of tight shots; they want to understand the flow of the house immediately. A wide-angle lens makes that possible by pulling back the visual boundaries, letting you show how the hallway feeds into the kitchen or how natural light travels across an open-plan living area. Focal lengths around 14–24mm on full-frame cameras have become the standard for interiors, with many experienced photographers settling between 16mm and 20mm as a practical sweet spot that balances spaciousness with believability.
The advantage is immediate: a buyer grasps the layout without effort. The risk is equally immediate: push too wide and the room begins to lie. Edges stretch, vertical lines bow, and the spatial narrative shifts from “inviting” to “suspiciously large.” The lens stops being a window and becomes a funhouse mirror. That’s why understanding where the line sits—between showing enough and showing too much—is the core skill of interior photography.
What counts as a wide-angle lens?
In everyday photographic conversation, “wide-angle” usually kicks in somewhere around 35mm, but for real estate interiors that’s barely a starting point. The rooms we photograph demand a much more expansive field of view. On a full-frame body, the working range for interiors typically begins at 24mm and stretches down to 14mm, with the 16–20mm zone doing most of the heavy lifting. Photographers using APS-C sensors need to think in equivalents: a 10–13mm lens on a crop body delivers roughly the same angle of view as that 14–20mm full-frame sweet spot. The math matters less than the visual result—you’re looking for a focal length that lets the room breathe without making it feel like a stadium.
Typical focal length ranges
| Camera format | Common real estate range | Best use case |
|---|---|---|
| Full-frame | 14–16mm | Tight bathrooms, small bedrooms, narrow hallways |
| Full-frame | 16–20mm | Living rooms, kitchens, most standard interiors |
| Full-frame | 20–24mm | More natural-looking rooms and larger spaces |
| APS-C | About 10–13mm equivalent | Similar interior coverage to full-frame wide-angle work |
How wide is too wide?
There’s a quiet threshold where a wide-angle lens stops revealing the room and starts inventing it. Ultra-wide focal lengths—think 12mm or 14mm used without restraint—can pull the near furniture aggressively toward the lens while shoving distant walls into a tunnel-like recession. The result is a room that feels stretched, hollow, and oddly unmoored from human scale. Perspective exaggeration becomes the dominant visual message, drowning out the actual proportions and finishes that make the property worth visiting.
A practical rule that serves well on site: use the narrowest wide-angle that still tells the room’s story clearly. A compact powder room may genuinely need 14mm to show the vanity, toilet, and doorway in one coherent frame. A generous living room with tall windows often looks more polished and grounded at 20mm or even 22mm. The goal is never maximum coverage; it’s maximum clarity without visual distrust.
Signs your lens is too wide
- Vertical lines bend or lean noticeably, turning doorframes into trapezoids.
- Corners look stretched or empty, as if the room is pulling apart at the seams.
- Furniture appears unnaturally small relative to the volume of the space.
- The room seems larger than it really is—sometimes dramatically so.
- Viewers feel the image looks “fake” even if they cannot explain why, a gut-level reaction to spatial dishonesty.
The difference between barrel distortion and perspective distortion
These two gremlins often get blamed for the same sins, but they come from entirely different places and demand different remedies.
- Barrel distortion is an optical characteristic of the lens itself. Straight lines near the edges of the frame bow outward, as if the image were painted on a slightly inflated balloon. It’s more pronounced at shorter focal lengths and tends to be symmetric. Lens profiles in editing software can usually tame it, but the correction isn’t free—it costs a bit of sharpness and crops the frame slightly.
- Perspective distortion is a camera-position problem. When you tilt the camera up to capture a high ceiling or down to include more floor, vertical lines converge. Walls appear to lean inward, and the room takes on a pyramid-like geometry. This isn’t a lens flaw; it’s a geometric consequence of the sensor plane not being parallel to the subject.
Why does the distinction matter? Because the fixes live in different stages of the workflow. Barrel distortion can be addressed in post-production with a click. Perspective distortion is best prevented on location by keeping the camera level—shifting the tripod height instead of tilting the head. Correcting severe perspective in software stretches pixels, softens detail, and often leaves the image looking digitally strained. The cleanest interior shots start with a level camera and a focal length that doesn’t demand heroic rescue work later.
How to choose the right focal length for each room
Focal length selection is a room-by-room negotiation between the space you’re given and the story you want to tell. A single zoom lens can cover the entire range, but the decision of where to set it should be deliberate, not habitual.
Small spaces
Bathrooms, compact utility rooms, narrow hallways, and tiny bedrooms leave you little choice but to reach for the wider end. On full-frame, 14–16mm becomes essential here—not to exaggerate, but simply to include the necessary elements: the shower enclosure, the vanity, the door swing. In these tight quarters, even a few millimeters make a visible difference. The challenge is keeping verticals straight when you’re backed against a wall; a tripod with a geared column and an electronic level becomes your closest ally.
Standard living spaces
Living rooms, open-plan kitchens, and primary bedrooms usually reward the 16–20mm range. This zone offers enough width to show spatial relationships—how the sofa grouping relates to the fireplace, how the island connects to the dining table—without pushing the room into caricature. At 18mm or 20mm, furniture retains a believable scale, and the viewer’s eye moves through the frame naturally rather than being yanked toward the corners.
Large rooms
When the room already feels generous, moving toward 20–24mm often produces a calmer, more truthful image. The space doesn’t need help looking big; it needs help looking refined. A slightly longer focal length compresses the scene gently, keeps distant details from shrinking into insignificance, and lends the photograph a quiet confidence that reads as “expensive.” This is especially true for grand living areas, ballroom-like open plans, or lobbies where the architecture itself does the heavy lifting.
Exterior and lifestyle details
Wide-angle lenses aren’t confined to interiors. For exteriors, they can pull together a façade and its landscaping in one frame, showing how the home sits on the lot. But don’t default to wide just because the lens is on the camera. If the shot is about a carved wooden door, a wrought-iron balcony detail, or the texture of stonework, a moderate telephoto often isolates the subject more cleanly and avoids the distracting foreground that an ultra-wide drags into the composition. Think about what the image needs to say, then choose the tool that says it best.
A practical shooting workflow for wide-angle interiors
A disciplined workflow turns a good interior shot into a consistently professional one. Wide-angle lenses amplify small mistakes, so precision at every step pays off in fewer editing headaches and more believable images.
- Start with the camera level. Keep the sensor plane vertical from the very first frame. Use the in-camera electronic level or a hot-shoe bubble level. This single habit eliminates the majority of perspective distortion before it ever reaches the memory card.
- Watch the edges of the frame. Wide lenses pull peripheral details into prominence. Scan the borders for half-cut furniture legs, bright slivers of window that blow out the exposure, stray cords, trash bins, and mirror reflections that include your tripod or lighting gear. The edges make or break the sense of a carefully prepared space.
- Compose with breathing room. Resist the urge to pack every square inch into the shot. A little negative space—an uncluttered wall, a sliver of ceiling, a calm foreground—lets the room feel balanced and prevents the image from reading as claustrophobic despite the wide field of view.
- Use a tripod. A sturdy tripod isn’t just about sharpness at slow shutter speeds. It locks in your camera height, keeps the framing consistent from room to room, and frees you to fine-tune composition without losing the level. In low light, it lets you shoot at base ISO and optimal aperture without compromise.
- Shoot a few focal lengths. If you’re using a zoom, capture each key view at two or three different focal lengths—perhaps 16mm, 18mm, and 20mm. Later, in the quiet of the editing process, you may discover that the slightly tighter frame tells a cleaner, more honest story than the widest possible view.
Common mistakes with wide-angle real estate lenses
Even experienced photographers slip into these traps. The wide-angle lens is an unforgiving partner; it rewards discipline and punishes carelessness with images that feel subtly wrong.
- Shooting too low. A camera positioned near waist height makes furniture loom and floor space dominate, creating an unnatural, bottom-heavy perspective. The room feels like it’s tilting away from the viewer. Aim for a height that approximates a standing person’s eye level, typically around 4.5 to 5 feet, adjusting slightly for room proportions.
- Tilting the camera up. This is the fastest route to converging verticals. Instead of angling the lens upward to capture a high ceiling, raise the entire tripod column while keeping the camera level. If you need more height than the tripod allows, consider a tripod with a longer column or a step stool—anything to avoid tilting.
- Overusing the widest end. A 14mm frame may technically contain the entire room, but it can also dissolve the room’s character into a generic wide-angle blur. Before pressing the shutter, ask whether the image actually describes the space or merely documents its boundaries. Often 18mm or 20mm produces a photograph that feels more intentional and less like a surveillance camera grab.
- Ignoring the corners. Wide-angle lenses reveal clutter that a normal lens would politely crop out. A stray power strip, a crumpled rug corner, a reflection of your lighting stand in a window—these details live in the periphery and quietly erode the premium feel of the image. Train yourself to scan the corners before every shot.
- Relying on distortion correction alone. Post-production is a safety net, not a trampoline. Heavy perspective correction stretches pixels, softens textures, and can introduce artifacts that degrade the image. The best correction is the one you never need to apply because the camera was level and the focal length was chosen thoughtfully on site.
Lens features that matter more than brand marketing
Spec sheets love to tout exotic glass formulas and nano-coatings, but in the field, a handful of practical characteristics determine whether a wide-angle lens becomes a reliable tool or a source of constant friction.
| Feature | Why it matters |
|---|---|
| Zoom range | Flexibility to move from a tight bathroom at 14mm to a spacious living room at 20mm without swapping glass. A zoom that covers 14–24mm or 16–35mm handles most interior scenarios without interruption. |
| Sharpness across the frame | Interiors demand edge-to-edge clarity. Soft corners in a wide-angle shot are immediately visible because architectural lines run through them. Look for a lens that holds detail well at f/7.1–f/8, the apertures most commonly used for interior depth of field. |
| Distortion behavior | Every wide lens distorts to some degree, but the character of that distortion varies. A lens with complex, wavy distortion is harder to correct cleanly than one with simple barrel distortion. Lenses with well-behaved distortion profiles save time in post and preserve more of the frame after correction. |
| Size and weight | On a long shoot day spent moving from room to room, a lighter lens reduces fatigue and makes it easier to keep the camera level. Compact wide zooms also balance better on smaller tripod heads. |
| Filter compatibility | A threaded front element lets you use polarizers to manage reflections on windows and polished floors, or neutral density filters for exterior twilight shots. Some ultra-wide lenses require bulky, expensive filter holders—a practical consideration for field work. |
| Minimum focusing distance | A lens that focuses close opens up detail shots without switching glass. You can capture the texture of a stone countertop or the grain of hardwood flooring while staying within the wide-angle aesthetic, adding variety to the final set of images. |
A lens doesn’t need to carry the highest price tag to perform well in real estate work. It needs to be predictable, consistent, and easy to control under the pressure of a tight schedule. Sharpness that only appears at f/5.6 on a test chart matters less than reliable performance at the apertures you actually use, in the corners you actually show.
Zoom or prime: which is better?
The zoom-versus-prime debate quiets down quickly in the context of real estate photography, where the sheer variety of room sizes and shapes tilts the scales toward flexibility. But both options have their place, and understanding their trade-offs helps you build a kit that matches your working style.
Wide-angle zooms
A high-quality wide zoom—something in the 14–24mm or 16–35mm range—is the pragmatic heart of most real estate kits. It lets you move from a cramped powder room to an airy great room without pausing to swap lenses, which matters when you’re working against fading daylight or a tight agent schedule. Modern zooms have closed the sharpness gap with primes significantly, and the ability to fine-tune framing by zooming slightly rather than repositioning the tripod saves real time on site.
Wide-angle primes
Primes still hold advantages in specific areas. A well-corrected 20mm or 24mm prime is often lighter, sharper at wider apertures, and may exhibit less complex distortion than a zoom at the same focal length. For photographers who specialize in high-end architectural work where every pixel is scrutinized, a prime can deliver a touch more clarity and a more predictable distortion signature. The trade-off is flexibility: you commit to a single perspective and must physically move the camera to reframe, which isn’t always possible in tight spaces or when the tripod is positioned in a doorway.
For the majority of real estate photographers, a wide-angle zoom is the more practical choice. Properties vary too dramatically for a single fixed focal length to handle every room gracefully, and the speed advantage of a zoom often translates directly into more properties shot per day.
When not to use a wide-angle lens
A wide-angle lens is not a universal storytelling tool. There are moments when it actively works against the image you need to create, and recognizing those moments is a mark of visual maturity.
Set the wide-angle aside when:
- You need a detail shot of materials, fixtures, or styling—the texture of a marble backsplash, the patina on brass hardware, the weave of a linen curtain. A moderate telephoto isolates these elements without the distracting context a wide lens forces into the frame.
- The room already feels spacious and you want a calmer, more measured perspective. A 24mm or even 35mm lens can make a large living room feel luxurious rather than merely vast.
- The image would exaggerate scale in a misleading way—for example, making a modest bedroom look like a ballroom. Honesty in representation builds trust with buyers who visit the property in person.
- Reflections or edge distortion would distract from the property’s strengths. A wall of windows, a mirrored accent wall, or highly polished floors can turn a wide-angle shot into a maze of unwanted reflections that a longer lens would naturally avoid.
Sometimes a slightly longer focal length makes a room look more expensive because the image feels restrained, deliberate, and free of the visual shouting that an ultra-wide can introduce. The goal is to match the lens to the message, not to force every space through the same wide-angle formula.
Quick checklist before you shoot
- Camera level is checked—bubble or electronic indicator confirms the sensor is vertical.
- Vertical lines look straight in the viewfinder; no leaning doorframes or window edges.
- Corners are free of clutter, stray cables, and unintended reflections.
- Lens choice matches room size—wider for tight spaces, slightly longer for generous ones.
- Wide end is used intentionally, not automatically; you’ve considered a slightly tighter frame.
- Exposure is balanced across windows and interior surfaces; highlight clipping is controlled.
- The composition shows layout and flow, not just wall coverage; the viewer understands how rooms connect.
Recommended approach by room type
| Room type | Practical focal length | Notes |
|---|---|---|
| Bathroom | 14–16mm | Use carefully to avoid awkward distortion; keep the camera level to prevent the shower enclosure from leaning. Include enough of the vanity and mirror to give a sense of functionality without making the room feel like a corridor. |
| Small bedroom | 14–16mm | Include the bed, windows, and entry path. A slightly elevated camera position can help show the floor plan without exaggerating the bed’s size. Watch for wide-angle stretch on furniture near the edges. |
| Living room | 16–20mm | Usually the safest balance of space and realism. Compose to show the seating arrangement’s relationship to focal points like a fireplace or a view. A bit of negative space above the furniture keeps the image from feeling crowded. |
| Kitchen | 16–20mm | Good for showing counter runs, islands, and cabinetry lines. Position the camera to emphasize the work triangle and natural light sources. Avoid cutting off the edge of an island or peninsula in a way that feels accidental. |
| Hallway | 14–16mm | Useful when showing flow between rooms. A hallway shot that captures doorways to adjacent spaces helps buyers understand the floor plan. Keep the camera level to avoid converging lines that make the hall feel like a narrowing tunnel. |
| Large open-plan area | 18–24mm | Helps keep the image grounded and natural. At these focal lengths, the space reads as expansive without distortion. Consider a slightly higher camera position to show the full sweep of the area and the relationship between zones. |
Conclusion
Wide-angle lenses are the backbone of real estate photography, but their power lies in restraint as much as in reach. The most effective interior images don’t scream “wide angle”; they simply let the viewer understand the space clearly, without visual friction. When you keep the camera level, choose the narrowest focal length that still tells the room’s story, and pay obsessive attention to what happens at the edges of the frame, your photographs stop being technical exercises and start being honest invitations. That shift—from documentation to visual storytelling—is what separates a listing that gets scrolled past from one that prompts a showing request. In the end, the lens is just a tool; the real skill is knowing when to let it step back and let the space speak for itself.
FAQ
What is the best focal length for real estate photography?
For full-frame cameras, the 16–20mm range serves as the most practical workhorse for interiors. It provides enough width to capture the room’s layout while keeping proportions believable. In very tight spaces like small bathrooms, 14–16mm becomes necessary, but it’s used as a solution to a spatial constraint, not a default creative choice.
Is 24mm wide enough for real estate?
Yes, 24mm can work well for larger rooms, open-plan areas, and exteriors where a more natural perspective is desired. It often produces images that feel calm and unforced. However, in compact rooms or narrow hallways, 24mm may not be wide enough to show the full context, forcing you to either back up through a wall or leave out important spatial information.
Do wide-angle lenses distort rooms?
They can, in two distinct ways. Barrel distortion is an optical property of the lens that curves straight lines near the edges; it’s correctable in software. Perspective distortion occurs when the camera is tilted, causing vertical lines to converge. The latter is far more noticeable in real estate images and is best prevented by keeping the camera level during the shoot.
Should I use a zoom or prime lens?
A zoom lens is generally the better fit for real estate work because it offers the flexibility to adapt to different room sizes without changing lenses. A high-quality wide zoom covers the essential focal lengths and speeds up the shooting process. Primes can offer marginal gains in sharpness and distortion control, but the practical advantage of a zoom usually outweighs those benefits for most property photographers.
How do I reduce distortion in interior photos?
Start with the camera perfectly level—this eliminates the most common and damaging form of distortion. Avoid tilting the camera up or down; adjust tripod height instead. Choose a focal length that’s wide enough to show the room but not so wide that barrel distortion becomes difficult to manage. Apply only light, targeted corrections in editing, as heavy-handed adjustments can degrade image quality and introduce artifacts.