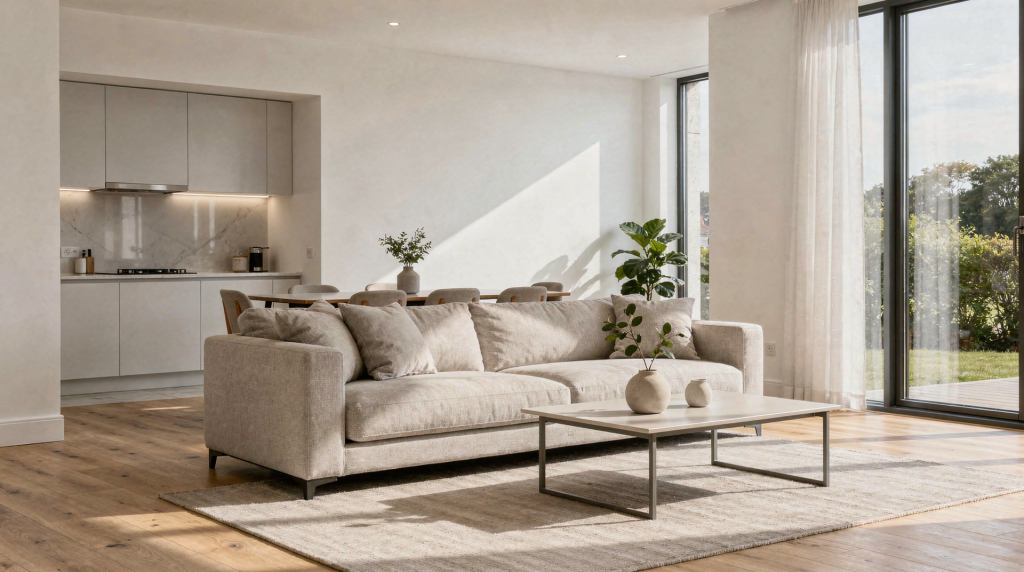
Natural light can make a room feel larger, cleaner, and more believable than heavy flash or flat artificial lighting. Used well, it helps buyers understand the real character of a space while keeping colors, textures, and views more honest.
Why Natural Light Matters in Interior Photography
In real estate interiors, light is not just illumination. It shapes mood, depth, and how a room reads on screen. Soft daylight can make finishes look refined, while harsh window light can flatten a room or blow out exterior views. The goal is not simply “bright photos” — it is controlled, even light that helps the space feel open and inviting.
For agents, that means stronger listing photos. For photographers, it means fewer technical mistakes and less time fixing avoidable problems in post-production. Beyond the technical, natural light carries a psychological weight: it signals honesty. A room bathed in gentle daylight feels authentic, as if the viewer could walk in and experience it exactly as shown. This trust is what separates a forgettable listing from one that compels a buyer to schedule a showing.
What Counts as Good Natural Light?
Good natural light is usually:
- Soft rather than harsh
- Directional but not extreme
- Even across the room
- Bright enough to reduce noise and blur
- Balanced with the exterior view through the windows
The best rooms for daylight photography typically have large windows, light-colored walls, and minimal direct sun hitting the camera angle. North-facing windows often give consistent, soft light, while east- and west-facing windows produce more directional light in the morning or afternoon. A photographer learns to read these qualities like a painter reads a studio: the angle of fall, the wrap around furniture, the way light pools on a wooden floor and lifts the texture of the grain. That kind of light tells a story about the space — it reveals rather than conceals.
The Best Time to Shoot Interiors with Natural Light
Timing matters more than many beginners realize. The same room can look calm at one hour and difficult at another.
Ideal shooting windows
- Bright overcast days: soft, diffused light with fewer hard shadows
- Morning light: useful for east-facing rooms
- Afternoon light: useful for west-facing rooms
- Midday: often best when the sun is high and less likely to create long shadows, though it depends on the property
Times to avoid
- Sunset, when light changes quickly and color shifts are harder to control
- Moments when direct sun is slicing across floors or walls unless that look is intentional
- Dark, low-light conditions unless the room is being supplemented carefully
If a property has dramatic sunlight patterns, shoot both a clean “marketing” version and a lifestyle version. That gives the client options without forcing one style to do both jobs. This dual approach acknowledges that light is a narrative tool: one frame sells the architecture, the other sells the atmosphere of living there.
How to Control Natural Light in a Room
Natural light is rarely used raw. It needs shaping.
1. Open up the room
Start by opening curtains, blinds, and interior doors where it helps the composition. This usually increases light flow and makes the space feel more connected. In open-plan layouts, opening doors between zones can create a visual pathway that guides the eye from foreground to background, reinforcing the sense of flow that buyers crave.
2. Diffuse harsh sunlight
If sunlight is too direct, soften it with sheer curtains, translucent fabric, or blinds partially closed. The aim is to spread the light instead of letting one bright patch dominate the frame. A single hot spot on a sofa or a glare on a polished floor pulls attention away from the room’s proportions and finishes. Diffusing transforms that aggressive beam into a gentle wash that wraps around objects and reveals their form.
3. Turn off competing lights
Mixed color temperatures are a common problem. Ceiling fixtures and lamps can introduce yellow or green shifts that clash with daylight. In many interior shoots, turning off artificial lights gives cleaner, more consistent color. Exceptions exist — a statement pendant or a softly lit reading nook can add character — but only when the color balance is intentionally managed.
4. Watch reflective surfaces
Mirrors, glass tabletops, polished counters, and glossy cabinets can bounce bright windows into the frame. Move slightly, change height, or adjust the angle of the room to avoid distracting reflections. Sometimes a shift of just a few inches removes a reflection that would otherwise break the illusion of a calm, uncluttered space. This is where the photographer’s eye for detail becomes as important as the camera settings.
A Practical Workflow for Shooting with Window Light
Here is a simple process that works well in real estate interiors.
Step-by-step approach
- Walk the room and identify the brightest window.
- Decide whether the light should be soft, directional, or mixed with a controlled amount of shadow.
- Turn off unnecessary artificial lights.
- Open blinds or curtains enough to shape the exposure.
- Position the camera to avoid pointing straight into an overly bright window unless that view is part of the story.
- Check the histogram or exposure preview rather than trusting the rear screen alone.
- Make a few test frames and inspect corner shadows, window highlights, and color balance.
- Refine the setup before shooting the full room.
This sequence saves time and prevents the common mistake of discovering exposure problems only after the shoot. It also builds a rhythm: each step is a small visual decision that accumulates into a coherent image. For instance, choosing to let a shadow fall across a corner can add depth and anchor the composition, while eliminating a distracting highlight on a glass table keeps the focus on the room’s architecture.
Recommended Camera Settings for Natural Light Interiors
The exact settings depend on the room, but these are useful starting points.
| Situation | Aperture | ISO | Shutter Speed | Notes |
|---|---|---|---|---|
| Bright room with large windows | f/8 | 100–200 | 1/60 to 1/125 | Good for clean, detailed interiors |
| Medium-lit room | f/8 | 200 | 1/15 to 1/30 | Tripod recommended |
| Dim room with smaller windows | f/8 | 400 | 1/4 to 1 second | Watch for shake and noise |
| Very dark room | f/8 | 800+ | 2 to 8 seconds | Use only when needed and stabilized |
A few practical notes:
- f/8 is a common choice because it keeps much of the room in focus.
- Lower ISO generally gives cleaner files.
- Slower shutter speeds require a tripod.
- Wider apertures can help in lower light, but they reduce depth of field and may not suit every real estate frame.
These numbers are a foundation, not a formula. A room with deep texture — exposed brick, heavy linen drapes, a rough-hewn mantel — might benefit from a slightly wider aperture to create a gentle fall-off that directs attention to a key feature. But for most listing work, front-to-back sharpness builds the sense of space that buyers expect.
Exposure Strategy: Protect the Windows
One of the biggest challenges in interior photography is the gap between a dark room and a bright exterior. If the windows are blown out, the room may still look usable, but it loses realism and visual quality.
A balanced approach
- Expose for the room if the goal is a clean interior presentation.
- Expose for the windows if the view is a major selling point.
- Bracket exposures if you need detail in both the interior and the exterior.
- Review the histogram to catch clipped highlights before moving on.
Bracketing is especially useful when the room has a strong view, such as water, skyline, garden, or pool. It also helps in open-plan spaces where the brightness changes from one area to another. The key is to preserve a natural relationship between inside and outside — a window should feel like a portal, not a white void or an artificially pasted scene.
When to Use HDR or Exposure Blending
HDR and manual blending are useful when natural light alone cannot hold both the interior and the exterior detail. The point is not to make the image look artificial. The point is to produce a file that represents what the room actually offers.
Use blending when:
- The windows are much brighter than the room
- The property has important outdoor views
- The room contains deep shadow areas that lose detail
- The listing needs a polished, accurate commercial look
Avoid overdoing it when:
- The property is better served by a natural, understated look
- Shadows are part of the room’s character
- You want to avoid the over-processed real estate style that feels fake
Blending is a tool of visual honesty when applied with restraint. It should recover what the eye would naturally see — the faint texture of a curtain against a bright window, the color of a garden beyond the glass — without turning the image into a hyperreal cartoon. The best blends are invisible.
How to Handle Different Room Types
Living rooms
Living rooms often have the best natural light and the most visual flexibility. Shoot toward the main light source when the room benefits from depth, or shoot across the light when you want to show the room width. A strong composition here might use a sofa as a leading line, pulling the eye toward a sunlit reading corner or a fireplace. The light should feel lived-in, not sterile.
Kitchens
Kitchens often contain reflective surfaces and mixed materials, so they can become harsh quickly. Diffuse direct sunlight, keep counters tidy, and avoid framing bright window reflections in appliances or cabinet doors. A polished stone island can become a mirror for a window, creating a distracting blob of light; shifting the camera a few degrees or lowering the blinds slightly can turn that surface into a soft, luminous plane that shows off the veining of the stone.
Bedrooms
Bedrooms benefit from soft, calm daylight. Sheer curtains and gentle side light usually work better than strong direct sun. The goal is to evoke restfulness. A low, warm shaft of morning light across a bedspread can be beautiful, but it must not overpower the room’s function. Often, the best bedroom shots use light to model the texture of linens and the subtle color of walls.
Bathrooms
Bathrooms are often small and reflective, so light control matters. Open any available window coverings, but avoid overexposure on white tile and glossy surfaces. A tiny powder room with a single window can become a jewel box of light if the exposure is carefully balanced to hold detail in both the brightest tile and the shadow under the vanity. Here, a tripod and a slower shutter speed allow a lower ISO, preserving the clean, crisp feel that buyers associate with hygiene and luxury.
Open-plan spaces
Open layouts can have multiple light zones. Treat each zone as its own exposure challenge and make sure no area is too dark to read. In a loft with floor-to-ceiling windows on one side and a darker kitchen on the other, the photographer must decide how to balance the narrative: sometimes a slight fall-off into shadow can define the transition between cooking and living areas, but it should never look like a mistake. Bracket and blend if needed to keep the entire space legible.
Common Mistakes to Avoid
- Shooting too early or too late in the day and fighting changing light
- Leaving lamp light on and creating color casts
- Pointing the camera straight at an unfiltered window
- Underestimating reflections in glass, chrome, and polished stone
- Ignoring the histogram and trusting the rear LCD
- Using natural light without checking if it is actually flattering the room
- Letting direct sun create bright streaks that distract from the architecture
Another subtle mistake is forgetting the visual weight of shadows. A heavy shadow across a doorway can read as a barrier, subtly suggesting the space is smaller or less welcoming. Learning to see shadows as compositional elements — not just absence of light — is a skill that separates competent work from truly compelling interiors.
Natural Light Checklist for Real Estate Interiors
Use this before you start the main shoot:
- Windows and blinds are adjusted for the desired look
- Unnecessary artificial lights are off
- Curtains are used only if they improve the light
- Reflections are checked in mirrors and glossy surfaces
- Camera is on tripod if shutter speed is slow
- White balance is set consistently
- Histogram is checked on test shots
- Exterior view is protected where needed
- Room styling is clean and uncluttered
- Final composition shows the room clearly, not just the window light
Simple Rules That Make a Big Difference
If you want a short version of the craft, remember these principles:
- Use daylight as the base, not as an accident.
- Soften harsh sun before it becomes a problem.
- Keep color temperature consistent.
- Expose carefully for highlights.
- Let the room feel real, not over-processed.
These are small decisions, but they separate an average listing gallery from one that feels polished and trustworthy. They also reflect a deeper understanding: that every room is a visual statement, and natural light is the voice that delivers it.
FAQ
What is the best natural light for real estate interiors?
Soft, even daylight is usually best, especially on bright overcast days or when direct sun is diffused by curtains or blinds. This quality of light minimizes harsh shadows and reveals the true colors of walls, floors, and furnishings without the need for heavy post-processing.
Should interior lights be turned off for real estate photos?
Usually yes, if they create mixed color temperatures or yellow casts. In some cases, carefully used lights can help — a warm pendant over a dining table can add a welcoming focal point — but daylight-only images are often cleaner and more consistent across a full property shoot.
Is midday the best time to photograph interiors?
Often, but not always. Midday can give steadier light, yet the best time depends on the window direction and how the sun hits the property. A west-facing living room might look flat at noon but glow beautifully at 3 p.m. The photographer’s job is to scout the light at different times and choose the window that serves the room’s best features.
Do I need a tripod for natural light interior photography?
Yes, if the room is not very bright. A tripod helps keep images sharp when shutter speeds are slow, and it also encourages more deliberate composition. When the camera is locked down, small adjustments to framing, height, and angle become intentional rather than casual.
Should I shoot directly into windows?
Only when the window view is important and the exposure is under control. Otherwise, it often causes glare and makes the room feel less balanced. If the view is a key selling point — a skyline, a garden, a body of water — then bracketing or blending can preserve both the interior and the exterior, but the composition should still lead the eye into the room, not out of it.
Final Thoughts
Natural light is one of the most powerful tools in real estate interior photography, but only when it is managed with intention. The best results come from reading the room, shaping the light, and choosing exposure settings that protect both the interior atmosphere and the exterior view.
When you work this way, the images feel clearer, calmer, and more convincing — which is exactly what a strong property presentation should do. Every window, every curtain, every reflective surface becomes part of a visual conversation between the space and the viewer. Mastering natural light means learning to guide that conversation so the room speaks for itself, honestly and beautifully.