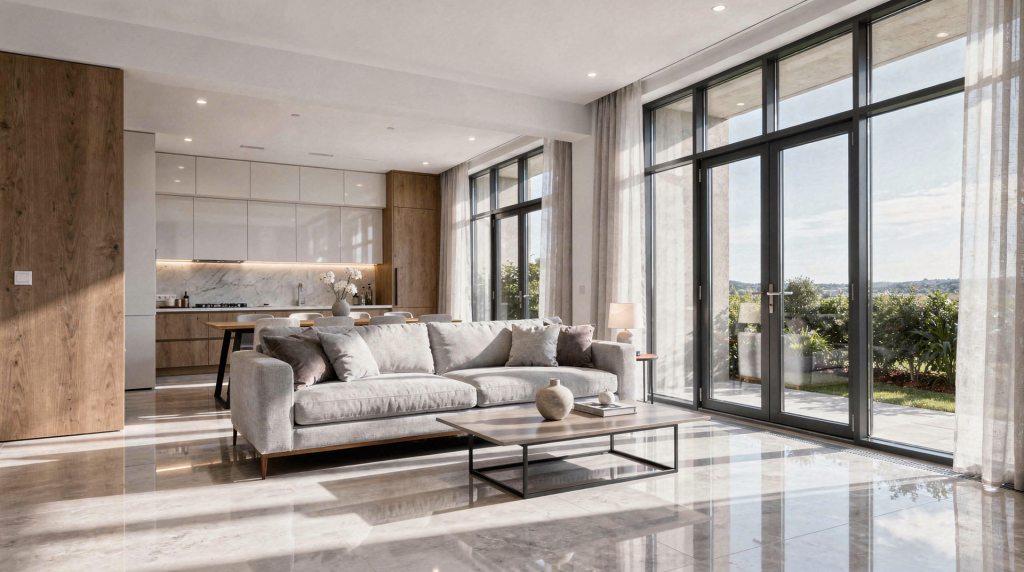
A well-considered shot list transforms a property shoot from a series of disconnected frames into a coherent visual narrative. It ensures efficiency, consistency, and completeness—capturing the images buyers expect while leaving space for the details that make a home distinct. When every frame has a purpose, the gallery does more than document; it guides the eye and shapes perception.
Why a Shot List Matters
A shot list isn’t just a memory aid—it’s a structural tool that brings logic to the shoot. It prevents missed rooms, yes, but more importantly, it guides you through the property in an order that mirrors how a buyer experiences a home: first impression, then flow, then specifics. Starting with the exterior and moving through the largest interior spaces before finishing with details creates a gallery that feels intuitive. This approach reduces reshoots, minimizes on-site confusion, and results in a cleaner listing presentation. When the sequence is right, the images begin to tell a story rather than simply document square footage.
What a Real Estate Photography Shot List Should Cover
A shot list should encompass every space that shapes a buyer’s understanding of the property. For most homes, this includes:
- Front exterior and curb appeal
- Entry and foyer
- Main living areas
- Kitchen and dining spaces
- Primary bedroom and bathroom
- Secondary bedrooms and bathrooms
- Utility spaces
- Outdoor areas
- Unique features and lifestyle amenities
But coverage isn’t one-size-fits-all. A compact condo demands a different approach than a suburban family home or a luxury estate. The objective isn’t to photograph every corner indiscriminately; it’s to capture enough to explain the layout, highlight genuine value, and present the property honestly. Think of it as editing in camera—each frame should earn its place in the gallery.
Recommended Shot List by Property Area
Exterior Shots
Exterior images set the tone for the entire listing. They’re the first thing buyers see, so they must be clean, well-lit, and compositionally strong. The light here matters enormously—shooting at the right time of day can transform a flat facade into something with depth and texture. Pay attention to how shadows fall across the entryway and whether the sky reads as a natural backdrop or a distraction.
Core exterior shots
- Front of the home, straight on
- Front of the home, angled from one side
- Front of the home, angled from the opposite side
- Entry door or front porch detail
- Driveway or garage, if it adds value
- Backyard wide shot
- Patio, deck, or pool area
- Side yard or lot view, if relevant
For homes with strong curb appeal, a twilight exterior shot can be a powerful addition. When the architecture, exterior lighting, or landscaping shines after sunset, that warm, ambient glow can evoke an emotional response that daytime shots rarely achieve. The key is timing—shoot when the interior lights balance with the fading sky, not after full dark.
Exterior priorities
- Show the full facade
- Give buyers a sense of lot depth and setbacks
- Include outdoor living spaces that support the home’s value
- Avoid cluttered angles that hide the property’s proportions
Interior Common Areas
Living rooms, family rooms, and shared spaces are where the home’s personality emerges. They need to communicate scale and flow, but also a sense of how light moves through the space. These rooms often sell the feeling of a home as much as the layout itself. Look for natural sightlines that pull the eye from foreground to background—a window, a fireplace, an open doorway—and use them to create depth.
Core common-area shots
- Living room wide shot from one corner
- Living room wide shot from the opposite corner
- Main seating area with the room’s strongest feature
- Fireplace, built-ins, or picture window detail
- Family room or den, if separate from the main living room
- Hallway or transition shot if it helps connect spaces
A practical rule: show at least two angles for the most important common room. The first establishes the room’s volume and light; the second clarifies its relationship to adjacent spaces. This visual handoff helps buyers understand the flow without needing a floor plan.
Kitchen and Dining Areas
The kitchen is frequently the emotional and functional heart of a home. It deserves more than a single hurried frame—buyers want to see work surfaces, storage, and how the space connects to dining and living areas. When composing kitchen shots, think about the triangle of sink, stove, and refrigerator, and make sure those relationships read clearly.
Core kitchen shots
- Kitchen wide shot from the main entrance
- Kitchen wide shot from the opposite angle
- Island or breakfast bar shot
- Appliance wall or range area
- Sink or prep area, if visually strong
- Kitchen looking toward the dining or living space
Core dining shots
- Dining room wide shot
- Dining room detail shot with light fixture, built-ins, or table setting if appropriate
Kitchens read best when they feel organized and legible. Avoid compositions that crop out key work surfaces or compress the room’s width. The goal is to show a space where someone can imagine cooking, not just a collection of appliances.
Bedrooms
Bedrooms should feel calm, spacious, and immediately understandable. The primary goal is to convey scale and natural light—over-styling can distract from the room’s actual proportions. Watch your verticals: even a slight tilt can make a restful room feel unsettled.
Primary bedroom
- Wide shot from the doorway
- Second angle showing windows, layout, or seating area
- Feature shot if the room includes a view, fireplace, or distinctive design element
Secondary bedrooms
- One strong wide shot per room
- Extra angle only if the room has a feature worth showing, such as built-ins, a large closet, or a view
Bedroom coverage tip
If a bedroom is compact, focus on demonstrating a functional layout rather than artificially expanding the space. Buyers appreciate visual honesty; an accurate, well-composed shot builds more trust than a distorted wide-angle attempt.
Bathrooms
Bathrooms should read as bright, clean, and complete. A single image often suffices for a secondary bath, but the primary bathroom typically warrants more attention—it’s a key selling point. Use diffused light where possible to avoid harsh reflections on tile and mirror surfaces.
Core bathroom shots
- Primary bathroom wide shot
- Vanity shot
- Shower or tub shot
- Toilet area only if it is cleanly integrated into the layout
- Secondary bathroom wide shot
- Powder room shot, if stylish or distinctive
Bathrooms are easy to over-photograph. Avoid a series of tight close-ups that fragment the space; the viewer still needs to understand the room as a coherent whole.
Utility and Support Spaces
Utility and support spaces are easily overlooked, yet they frequently matter to buyers evaluating storage and functionality. Including them makes the listing feel thorough and honest. These rooms don’t need dramatic lighting, but they do need to look intentionally photographed, not like an afterthought.
Useful utility shots
- Laundry room
- Mudroom or drop zone
- Pantry
- Walk-in closet
- Garage
- Basement or bonus room
- Home office
- Gym, theater, or flex space
For a plain but functional utility area, one clean, well-lit photo is usually sufficient. But if the space features custom storage, upgraded finishes, or meaningful square footage, give it the attention it deserves—these details can tip a buyer’s decision.
Special Feature Shots
Some properties demand additional images because they include features that directly influence perceived value. These shots should feel intentional, not like afterthoughts. When you encounter a statement staircase or a wine cellar, treat it as you would a portrait: find the angle that reveals its character.
Feature shots to consider
- Pool
- Hot tub
- Outdoor kitchen
- Fire pit
- Covered patio
- Balcony or terrace
- Scenic view
- Workshop
- Wine cellar
- Custom shelving
- Statement staircase
- High-end finishes or fixtures
Every feature shot should earn its place in the narrative. If a wine cellar, statement staircase, or custom shelving helps tell the story of the home, include it. If it feels like filler, leave it out.
How Many Photos Should You Shoot?
The ideal number of photos depends on the property’s size, layout, and level of finish. A standard single-family home typically yields 25 to 45 usable images, while larger or higher-end properties may require more. But more isn’t always better—the gallery should feel complete, not repetitive. Edit with the buyer’s attention span in mind; a tight, well-sequenced set of 30 images often outperforms a sprawling gallery of 60.
| Property type | Typical photo range | What to prioritize |
|---|---|---|
| Small condo | 15–25 | Main rooms, kitchen, bath, view, and storage |
| Standard single-family home | 25–45 | Exterior, shared spaces, kitchen, bedrooms, bathrooms, outdoor areas |
| Large home or luxury property | 40–70+ | Full coverage, multiple angles, features, and lifestyle spaces |
A Practical Shoot Order
A consistent shoot order saves time and reduces the likelihood of missed shots. It also helps maintain the property’s condition longer, especially in occupied homes. Following a logical path means you’re not walking through rooms you’ve already styled, and the light stays consistent across sequences.
- Start with the exterior while light is best.
- Move to the front entry and foyer.
- Shoot the main living areas.
- Cover the kitchen and dining spaces.
- Photograph bedrooms and bathrooms.
- Finish with utility rooms and special features.
- Return to any areas that need a better angle or cleaner frame.
This sequence minimizes backtracking and keeps the home looking its best throughout the shoot.
Pre-Shoot Checklist
A shot list is only as effective as the preparation behind it. Before the camera comes out, ensure the home is ready. A quick pre-shoot walkthrough not only saves editing time later but also helps you spot potential composition issues—like a mirror reflecting the camera or a crooked lampshade that will distract in the final image.
- Open blinds and curtains
- Turn on lights only when they improve the scene
- Remove trash bins, cords, pet bowls, toiletries, and cleaning products
- Straighten chairs, rugs, and bedding
- Clear countertops as much as possible
- Check mirrors for reflections
- Look for crooked frames, open toilet lids, and visible dust
- Walk each room once before shooting
Common Mistakes to Avoid
Even experienced photographers can fall into these traps. Here’s what to watch for:
1. Shooting too few angles
A single frame per major room rarely conveys the full spatial story. Buyers need enough visual context to grasp size, layout, and how one space relates to another. Without that, the gallery feels incomplete.
2. Overusing ultra-wide angles
Ultra-wide lenses are useful tools, but excessive distortion can make rooms feel warped and untrustworthy. Use them to show space, not to deceive. When the proportions feel off, buyers sense it immediately.
3. Ignoring transitions
Hallways, stairwells, and entry sequences are the connective tissue of a home. Skipping them can leave the layout feeling fragmented. A well-placed transition shot helps buyers mentally walk through the property.
4. Overloading the gallery with details
Detail shots add texture, but they should never come at the expense of clear spatial coverage. Establish the rooms first, then layer in the details that reinforce the home’s character.
5. Forgetting unique value
If a property has a defining feature—a view, a workshop, a finished basement—it should be integrated into the shot list from the beginning, not tacked on as an afterthought. These are often the elements that set a listing apart.
Simple Shot List Template
Use this baseline template for most properties, then adjust as needed. It covers the essentials without overcomplicating the shoot:
- Front exterior, straight on
- Front exterior, angled left
- Front exterior, angled right
- Entry or front porch
- Foyer
- Living room, angle 1
- Living room, angle 2
- Kitchen, angle 1
- Kitchen, angle 2
- Dining area
- Primary bedroom, angle 1
- Primary bedroom, angle 2
- Primary bathroom
- Secondary bedrooms
- Secondary bathroom
- Laundry room or mudroom
- Garage or storage area
- Backyard
- Patio, deck, or pool
- Special feature or lifestyle shot
When to Customize the Shot List
Not every property fits a standard template. Customize the shot list when the home presents:
- Unusual layout
- Small or awkward rooms
- Premium outdoor living
- Strong views
- Architectural character
- Empty rooms that need layout clarification
- Multi-level design
- Commercial-style amenities in a residential setting
The shot list is a framework, not a straitjacket. It should adapt to the property’s unique characteristics, not flatten them into a generic formula.
Final Checklist Before You Leave
Before packing up, run through this final checklist to ensure nothing was missed. This last pass often catches the small oversights that can undermine an otherwise strong gallery:
- Every major room is covered
- The exterior has enough angles
- The kitchen has at least one clear wide shot
- The primary suite is fully represented
- Any unique selling feature is photographed
- No room looks accidentally omitted
- The gallery tells a logical visual story
FAQ
How many photos should be in a real estate listing?
For a typical single-family home, 25 to 45 images usually strike the right balance between completeness and viewer engagement. But the final count should reflect the property’s size, layout, and unique selling points—there’s no magic number that works for every listing.
Do I need two angles of every room?
Not always. Main living spaces benefit from two angles to establish volume and flow, while smaller rooms often need only one strong, well-composed image. Let the room’s importance and complexity guide you.
What rooms should always be photographed?
At minimum, include the exterior, entry, living area, kitchen, primary bedroom, primary bathroom, and any major outdoor space. These are the non-negotiables that form the backbone of the visual story.
Should I photograph closets and laundry rooms?
Yes, if they add useful information or demonstrate meaningful storage and functionality. One clean, well-lit image is often enough to convey their value without overloading the gallery.
What is the biggest mistake in real estate photography?
Missing important rooms or presenting them in a way that makes the property hard to understand. Clear, honest coverage matters far more than sheer quantity of images.
Conclusion
A strong real estate photography shot list is practical, repeatable, and responsive to the property. It covers the expected spaces, highlights the features that matter, and gives buyers enough visual information to build genuine interest before they ever step inside. When you shoot with structure, the final gallery transcends a simple collection of images—it becomes a curated visual walkthrough that communicates the property’s true value.