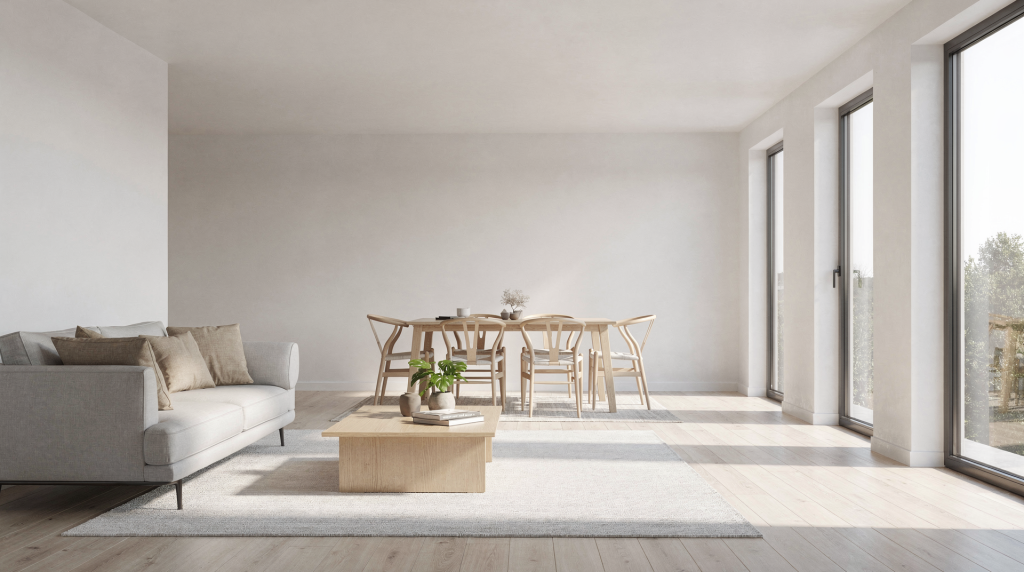
A strong property shoot begins long before the camera comes out. The goal is never to make a home look artificial — it’s to make the space read clearly, feel genuinely inviting, and photograph without distractions. When every surface and sightline works in favor of the architecture, the viewer instantly grasps the layout, scale, and potential of the property. That kind of clarity saves time on shoot day, reduces the need for retakes, and gives every room a far better chance to hold attention in a crowded online feed.
Why preparation matters
In real estate photography, small problems become big ones the moment they hit the sensor. A cluttered countertop visually compresses a kitchen. A dirty window eats natural light and softens contrast. A stray cable, a trash bin, or a toothbrush pulls focus away from the room itself. The camera is unforgiving — it records everything, and visual noise fractures the composition. That’s why preparation isn’t just about tidying. It’s about shaping how the property will be seen, directing the viewer’s eye to volume, texture, and flow rather than to the debris of daily life.
The core principle: show space, not stuff
Before you start, ask one simple question in every room: What should a buyer notice first? If the answer is “the coffee machine, the pile of shoes, or the laundry basket,” the room isn’t ready yet. The best prep removes visual noise so the architecture, finishes, and light can do their job. As a photographer, I often see well-proportioned spaces lose their impact behind domestic clutter. Clearing the canvas is the first step toward a strong image — it lets the walls, floor, and ceiling become the main characters, not the background for everyday chaos.
Step-by-step: how to get a property photo-ready
1. Start with a full declutter
Decluttering is the foundation of every successful real estate shoot. It doesn’t just free up square footage — it gives the eye an unobstructed path through the frame. In a clean, pared-back room, architectural lines take center stage, and the sense of volume expands.
Remove or reduce:
- Countertop appliances
- Extra toiletries
- Mail, papers, magazines
- Pet bowls, leashes, litter boxes
- Chargers, cords, and remotes
- Children’s toys
- Shoes, coats, and bags
- Trash cans and laundry baskets
A useful rule: if an item isn’t helping the room tell its story, it probably needs to go. Think of each object as a visual weight — the more you remove, the lighter and larger the space will feel on camera.
2. Deep clean every visible surface
Photos reveal what the eye usually ignores in person. Dust, fingerprints, smudges, and buildup become glaringly obvious under bright light, especially on glossy or reflective surfaces. Cleanliness directly influences how cared-for and high-quality a property appears.
Focus on:
- Floors and baseboards
- Kitchen counters and appliance fronts
- Mirrors and glass doors
- Bathroom sinks, faucets, and toilets
- Window glass inside and out
- Light fixtures and ceiling fans
- Door handles and switches
If possible, clean the property right before the shoot. A freshly cleaned home photographs more crisply, and windows free of grime let in more light, improving both brightness and overall clarity. Every reflective surface — from a stainless-steel fridge to a glass shower door — becomes a potential highlight or a distraction; keeping them spotless is non-negotiable.
3. Depersonalize the space
The listing should help buyers imagine living there. Too many personal items make that harder. From a visual storytelling standpoint, family photos and personalized signs create a sense of someone else’s presence, which can subconsciously push a viewer away. The aim is to create a neutral backdrop into which any buyer can project their own life.
Remove:
- Family photos
- Personalized signs
- Medications
- Religious or political items
- Documents and visible paperwork
- Vanity items sitting out in bathrooms
This doesn’t mean making the home cold. It means making it neutral enough for the widest audience — a space that feels open to possibility rather than occupied by a specific identity.
4. Handle light before styling
Light is one of the biggest factors in how a room photographs. Before you style, make sure every room is ready to receive light properly. The camera sees illumination as structure: it defines volume, reveals texture, and sets the emotional tone of the image.
Do this:
- Open blinds, curtains, and shades
- Replace burnt-out bulbs
- Match bulb color temperature where possible
- Turn on lamps and overhead lights if needed
- Clean windows to improve brightness and clarity
A room that is tidy but dark will still feel flat and uninviting in photos. Light should feel intentional, not accidental. Even a beautifully composed shot loses its power if the light is muddy or uneven. When you walk through the property, notice where shadows fall and whether any corner feels neglected — a small lamp or an adjusted curtain can transform the mood.
5. Reposition furniture for breathing room
Sometimes a room feels cramped not because of its actual size, but because furniture is pushed too tightly against walls or blocks natural pathways. The camera compresses perspective differently than the human eye; every extra inch of clutter on the foreground can “eat” the perceived volume. Pulling pieces slightly away from walls helps the room read more generously on screen.
Try this:
- Create clear walking paths
- Remove oversized or unnecessary pieces
- Center key furniture where it makes sense compositionally
- Angle chairs or décor to improve balance
- Keep sightlines open from doorways
The aim isn’t to redesign the room. It’s to give the camera room to see it — to let the lens capture the actual scale and flow without visual barriers. A slight shift in a sofa or the removal of a bulky ottoman can make the difference between a room that feels tight and one that breathes.
6. Stage room by room with purpose
Each space should have one clear job in the listing photos. Avoid overdecorating. Instead, use a few well-placed items to suggest function and scale. Think of staging as punctuation in a visual sentence — a few accents that guide the eye without shouting over the architecture.
Examples:
- Kitchen: one bowl of fruit, a cutting board, or a simple vase
- Living room: a throw blanket, a couple of books, or a neat tray
- Bedroom: smooth bedding, matching pillows, and uncluttered nightstands
- Bathroom: folded towels, a clean soap dispenser, nothing else visible
- Dining area: a simple table setting or one centerpiece
These small gestures create a sense of lived-in warmth without clutter. They give the eye a place to rest and help the viewer understand how the space might be used, all while keeping the focus on the room’s proportions and light.
Room-by-room preparation checklist
| Area | What to do | What to remove |
|---|---|---|
| Entryway | Clear the floor entirely, wipe all surfaces, add a single understated accent like a vase or a clean console | Shoes, bags, mail, umbrellas |
| Living room | Straighten furniture, fluff pillows, hide cords, ensure sightlines are open | Pet beds, remotes, extra blankets, stray electronics |
| Kitchen | Clear counters, polish appliances, clean sink, leave only one or two intentional items | Small appliances, sponges, dish racks, detergent bottles |
| Bathroom | Close toilet lids, remove all products, shine mirrors and glass, display fresh towels | Toothbrushes, medication, trash bins, personal care items |
| Bedroom | Smooth bedding, open windows for natural light, reduce surfaces to essentials | Laundry, chargers, personal photos, excess pillows |
| Laundry room | Neaten detergent and supplies, sweep floor, hide hampers | Loose items, baskets of mixed clothes, clutter on machines |
| Exterior | Sweep walkways, mow lawn, hide bins, wipe down outdoor furniture | Cars, garden tools, hoses, toys, recycling containers |
Exterior prep is not optional
Many buyers form their first impression from the exterior photo. The façade and front yard are the visual overture to the entire property. If the approach feels neglected — cars parked in front, hoses snaking across the lawn, bins in plain sight — the viewer subconsciously registers carelessness, and the interior images have to work twice as hard to rebuild trust. Curb appeal matters even if the inside is immaculate.
Prepare the outside by:
- Parking cars away from the front of the house
- Moving trash and recycling bins out of sight
- Sweeping porches, steps, and walkways
- Mowing the lawn and trimming hedges
- Putting away toys, garden tools, and hoses
- Wiping down outdoor furniture
Treat the exterior with the same curatorial eye you’d bring to a living room. The first frame a buyer sees should feel intentional, clean, and welcoming — an invitation to look further.
Common mistakes that weaken listing photos
Leaving too much on display
Countertops crowded with appliances or bathroom shelves packed with products make the property feel smaller and less polished. The camera sums up the visual weight of every object, and the room loses its sense of air and order.
Forgetting reflections
Mirrors, glass shower doors, shiny appliances, and windows can reflect clutter, the photographer, or unwanted objects. Before the shoot, check every reflective surface from multiple angles — what’s invisible to the naked eye can become a glaring distraction in the final image.
Ignoring small defects
Burned-out bulbs, crooked blinds, loose towels, and messy cords may seem minor, but they are immediately visible in photos. They chip away at the impression of a well-maintained home and can make a space feel careless.
Overstaging
Too many decorative objects make a room feel styled for a magazine instead of livable. Buyers usually respond better to restraint — a few well-chosen pieces leave room for imagination and allow the architecture to speak.
Cleaning too late
If the home is cleaned days before the shoot, surfaces may collect dust again. Timing matters. A last-morning wipe-down of key surfaces ensures the camera captures the property at its freshest.
A practical pre-shoot timeline
Two to three days before
This is when you create the clean canvas. Declutter every room, remove personal items, fix obvious repairs, and confirm which rooms will be photographed. Plan where furniture or décor may need to move — this foresight prevents rushed decisions on shoot day and lets you see the space with a photographer’s eye.
One day before
Deep clean the home. Wash windows and mirrors — clean glass directly impacts light transmission and image sharpness. Replace light bulbs, vacuum, mop, and dust every surface. This is the last major push before the final walk-through, and it sets the stage for a crisp, luminous set of images.
On the morning of the shoot
Open blinds and curtains, turn on the right lights, empty bins, hide cords and small items. Do one final walk-through with fresh eyes — imagine you’re looking through the viewfinder. This is when you catch the stray coffee cup or the crooked lampshade that would otherwise end up in the frame.
Quick pre-shoot checklist
Use this as a final sweep before the photographer arrives. Each item eliminates a potential visual irritant:
- All counters are clear
- All beds are made
- Toilet lids are down
- Windows are clean
- Lights are working
- Blinds are straight
- Trash cans are hidden
- Cords are tucked away
- Cars are moved
- Floors are clean
- Personal items are removed
- Outdoor areas are tidy
What to leave in place
Not everything needs to be stripped out. A property still needs personality and scale. The camera needs objects of known size to help the viewer gauge proportions — a lamp, a rug, a piece of wall art. Usually safe to leave:
- Large furniture
- A few neutral décor items
- Lamps
- Clean rugs
- Simple wall art
- Built-in shelving styled lightly
- Outdoor furniture if it looks neat and intentional
The best props support the room. They don’t compete with it. They give the eye a place to land and subtly reinforce the function of the space without pulling focus from the light and volume.
How to prepare occupied homes differently
If the property is still lived in, preparation takes more coordination. The key is to separate daily life from the photo session for a few hours. Even a busy family home can photograph beautifully with a strong system in place.
Plan for:
- Temporary storage bins for clutter
- A staging box for personal items that can be quickly stashed in a closet or car trunk
- A clear list of rooms that need to stay untouched after cleaning
- A designated “last-minute hiding spot” for anything that surfaces right before the shoot
Occupied homes usually demand more effort, but the payoff is a set of images that feel serene and spacious — as if the property had been waiting for its close-up all along.
A simple rule for every room
If a buyer walked into the room with no context, would they understand:
- What the room is for?
- How big it feels?
- Where the eye should go first?
If the answer is yes, the room is ready. This test works like a visual tuning fork — it quickly reveals whether the space communicates clearly or whether clutter and poor arrangement are getting in the way.
FAQ
How clean should a property be before a photo shoot?
It should be cleaner than for a normal showing. Photos expose dust, streaks, and clutter that people may overlook in person. Glass, mirrors, and glossy surfaces need extra attention — they directly affect light and sharpness in the final image.
Should every room be staged?
Not heavily, but every room shown in photos should be tidy, readable, and free of distractions. Even utility spaces like a laundry room benefit from minimal organization; a clean, simple backdrop helps the viewer focus on the home’s potential rather than its current chaos.
Do lights need to be on for all photos?
Often yes. Mixed light can make rooms feel uneven, so turn on the lights that help the space feel bright and balanced. In some cases, the photographer may blend ambient light with flash, but the starting point should be intentional, consistent illumination.
What is the most important room to prepare first?
Start with the kitchen, living room, and primary bedroom. Those spaces usually carry the most weight in the listing and often serve as the anchor images that determine whether a buyer scrolls on or stops to explore.
How far in advance should a seller start preparing?
Ideally two to three days before the shoot, with deep cleaning and final touch-ups completed the day before or morning of. This timeline allows enough breathing room to notice details that might otherwise slip through — a smudge on a mirror, a crooked blind, a stray cord.
Final thought
A well-prepared property doesn’t just look better in photos. It communicates care, scale, and livability in seconds. That’s what makes the difference between a listing people scroll past and a listing they stop to explore. When every surface, shadow, and sightline has been considered, the images don’t just show a house — they invite someone to imagine a life inside it.