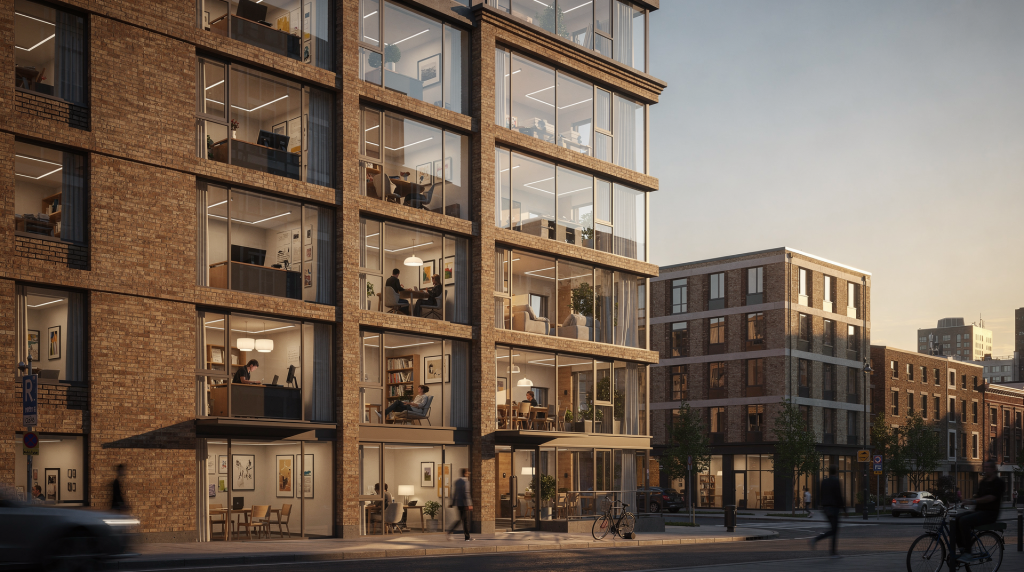
A building can do far more than house a function. When you photograph it with intent, it can suggest a mood, reveal a rhythm of movement, and communicate how a space should be experienced. The strongest architectural and interior images do not simply show rooms; they guide a viewer through them. This is not about producing a sterile inventory of walls and windows. It is about constructing a sequence that makes someone feel they have walked through the property, paused in the right places, and left with a clear emotional impression.
What a visual narrative actually means
A visual narrative is the story a sequence of images tells. In built environments, that story may be about calm, openness, craftsmanship, heritage, luxury, family life, or flow. It is not only about what the space looks like, but how it feels to move through it. Think of it as the difference between a single portrait and a photo essay: one frame can be striking, but a series reveals personality, context, and change over time. In architectural work, the narrative lives in the transitions—how a narrow hallway opens into a sunlit living area, or how the texture of a worn stone floor contrasts with a sleek modern kitchen.
For photographers, this matters because one isolated frame rarely explains a building well. A narrative combines wide views, details, transitions, and moments of light so the viewer understands both the structure and its atmosphere. When I shoot a lobby, for instance, I might start with the entrance door, move to the reception desk, then capture the seating area, and finally close on the way light falls across a marble floor. Each image answers a question the previous one raised, pulling the viewer deeper into the experience.
Start with the building’s central idea
Before shooting, define the property’s core message in one sentence. This is not a marketing tagline; it is a working thesis that keeps your eye disciplined. I often scribble it in a notebook before I even unpack the camera.
Examples:
- “This home is about natural light and indoor-outdoor living.”
- “This apartment is defined by compact efficiency and clean lines.”
- “This historic building tells a story of texture, age, and craftsmanship.”
That sentence becomes your editing filter. If a frame does not support the idea, it probably does not belong in the final set. I have discarded technically perfect shots because they diluted the narrative—a wide-angle view of a guest bathroom in a home whose story was about the grand, light-filled living spaces, for example, only distracted from the main thread.
Questions to ask on location
Walking the property without the camera is a ritual I never skip. It lets me feel the space before I start dissecting it through a viewfinder. I ask myself:
- What is the first impression of the building? Is it imposing, welcoming, serene?
- What feature is most memorable? A staircase, a window seat, a material contrast?
- Where does the eye naturally move? Follow the lines of sight; they often reveal the building’s own intended narrative.
- Which spaces feel public, private, or transitional? These distinctions shape the emotional arc.
- What should the viewer understand by the end of the sequence? That answer becomes the closing image.
The story arc of a building
A strong photo set usually follows a simple narrative structure that mirrors how we experience space in real life: arrival, movement, discovery, and pause. I often think of it as a three-act structure compressed into a visual sequence.
| Narrative stage | What to show | Purpose |
|---|---|---|
| Opening | Exterior, entrance, approach | Sets expectations and tone |
| Orientation | Hallway, foyer, circulation spaces | Helps the viewer understand layout |
| Main spaces | Living room, kitchen, bedrooms, work areas | Shows scale and function |
| Details | Materials, fixtures, textures, light patterns | Adds character and specificity |
| Closing | Best view, emotional highlight, signature feature | Leaves a lasting impression |
This arc is not rigid, but it provides a backbone. When I photograph a multi-level home, I might use the stairwell as a recurring motif—showing it from different angles to stitch the floors together visually. The transitions become the glue that holds the story together, preventing the set from feeling like a disconnected slideshow.
Composition techniques that support the story
Composition is not decoration. It is how you control attention. Every decision about where to place the camera, what to include, and what to leave out either reinforces the narrative or weakens it.
1. Use leading lines
Floorboards, stair rails, countertops, corridors, and beams can guide the eye toward the subject. This creates movement and makes the image feel intentional. In a long hallway, I might align the camera so the lines converge just off-center, pulling the viewer toward a window or a piece of art at the end. It is a subtle but powerful way to say, “Look here.”
2. Keep verticals clean
In architectural photography, straight walls and door frames matter. Crooked verticals make a building feel unstable and distract from the structure. I use a geared head on my tripod to micro-adjust, and if I must tilt up, I correct perspective in post. The goal is to make the space feel grounded, as if the viewer is standing inside it, not looking at a distorted snapshot.
3. Balance foreground, middle ground, and background
Layering gives a room depth. A chair in the foreground, a table in the midground, and a window in the background can make the image feel lived-in and dimensional. This technique borrows from fine art portraiture, where a shallow depth of field isolates a subject against a layered environment. In interiors, I often keep everything sharp, but the spatial layers still create a sense of progression.
4. Include negative space when needed
Empty space can communicate calm, scale, and simplicity. Not every corner needs to be filled. A minimalist living room with a single sculptural chair and a vast blank wall tells a very different story than a cluttered family den. I use negative space deliberately to let the architecture breathe.
5. Frame through thresholds
Doorways, windows, and arches are natural framing devices. They create context and suggest the viewer is moving through the building instead of looking at it from a distance. Shooting from one room into another through an open door adds a voyeuristic, inviting quality—it hints at what lies beyond and pulls the eye deeper into the sequence.
Light is part of the narrative
Light shapes mood faster than any styling choice. In a building, it can make the difference between a static record and a persuasive story. I treat light as a character in the narrative: it can be soft and diffused for a serene morning scene, or sharp and directional to emphasize texture and geometry.
Practical lighting decisions
- Use soft natural light when possible for rooms that should feel calm and welcoming. I often schedule shoots for the time of day when the light enters at a low angle, grazing surfaces and revealing texture.
- Avoid harsh overhead lighting if it creates strong color casts or distracting shadows. In kitchens with mixed light sources, I might turn off the overheads and rely on window light and under-cabinet LEDs for a cleaner look.
- Watch windows carefully; bright blown-out windows can flatten the sense of depth. If the view outside is important, I bracket exposures and blend them, or I shoot from an angle that minimizes the contrast.
- If needed, shoot from an angle rather than directly toward the brightest source. This reduces flare and keeps the interior visible.
- Consider the time of day as part of the story, not just a technical detail. Morning light can feel fresh and quiet, ideal for a home that wants to convey a new beginning. Late afternoon light can feel warm and domestic, perfect for a family-oriented property. In some architectural spaces, a darker, directional light may better suit the design than a bright evenly lit frame—think of a concrete stairwell where a single shaft of light creates drama.
Details that make the story believable
A visual narrative feels stronger when it includes small, specific details. These are not filler shots. They are evidence. In my early days as a fine art photographer, I learned that a single detail—a crack in plaster, a reflection in a puddle—can carry as much emotional weight as a grand landscape. The same applies to buildings.
Useful detail subjects include:
- A worn threshold in an older home, telling a story of generations of footsteps.
- Texture in plaster, wood, stone, or tile that invites the viewer to imagine touch.
- Reflections in glass or mirrors that add layers and complexity.
- Joinery, handles, or custom built-ins that speak to craftsmanship.
- The way light lands on a stair tread or countertop, turning an ordinary surface into a moment of beauty.
These images help the viewer understand the material character of the building. They also slow the pace of the sequence, which gives the set emotional texture. After a series of wide room shots, a close-up of a brass doorknob or a shadow pattern on a wall acts like a rest in a musical score—it lets the eye pause before moving on.
How to build a shoot plan
A good shoot plan prevents random coverage. When I arrive on location, I resist the urge to start shooting immediately. Instead, I treat the first walk-through as a research phase.
Step-by-step approach
- Walk the property without the camera first. Notice how light moves, where sounds echo, and which spaces feel most alive.
- Identify the strongest entry point, main axis, and signature feature. The entry point is often the front door, but sometimes a side entrance or a garden gate tells a better story.
- Decide what the story is: airy, compact, refined, historic, minimal, or expressive. This decision will guide every framing choice.
- Map a logical image order from exterior to interior. I sketch a quick floor plan with arrows indicating the intended visual path.
- Photograph wide views before details. Wide shots establish context; details enrich it. If I shoot details first, I risk losing the spatial thread.
- Capture transitional spaces that connect rooms. Stairwells, hallways, and landings are often overlooked, but they are essential for flow.
- Finish with the image that best summarizes the property’s appeal. This is the “hero” shot that will linger in the viewer’s mind.
Simple checklist before shooting
- Are the lines straight? Check verticals and horizontals.
- Does each frame add something new? Avoid redundancy.
- Is the lighting consistent with the mood? If the story is airy, avoid dark, moody frames.
- Are there enough transition shots? At least one per floor or major zone.
- Does the sequence feel like a journey? Review the order mentally.
- Is the final image memorable? It should encapsulate the entire narrative.
Common mistakes that weaken the narrative
Many building photographs look technically fine but still fail as a story. I have seen portfolios full of sharp, well-exposed images that left me with no sense of the place. The problem is almost always a lack of narrative discipline.
Typical problems
- Too many similar wide shots, creating a monotonous rhythm. Each wide view should reveal a new aspect of the space.
- No clear opening image. The first photo should establish context and draw the viewer in; a random detail or a poorly composed exterior fails to do that.
- Overuse of ultra-wide lenses that distort the space. While a 14mm lens can show an entire room, it can also make a cozy den feel like a cavern. I often switch to a 24mm or 35mm for a more natural perspective.
- Cluttered frames with no visual hierarchy. If everything in the room demands attention, nothing does. I remove distracting objects before shooting, or I compose to minimize them.
- Random sequencing in galleries or listings. Images should flow logically, not be arranged by file name.
- Ignoring hallways, stairs, and transitions. These are the connective tissue of the building; without them, the set feels disjointed.
- Photographing every room the same way, even when their functions differ. A kitchen and a bedroom require different compositional approaches to tell their respective stories.
The fix is not more images. It is clearer decisions. Before pressing the shutter, ask: “What does this frame contribute to the overall narrative?” If the answer is vague, move on.
Adapting the story to the type of building
Not every building should be photographed the same way. The narrative voice must match the architecture and its intended use. A minimalist concrete pavilion and a Victorian family home demand entirely different visual languages.
| Building type | Narrative focus | Visual priority |
|---|---|---|
| Family home | Comfort, flow, livability | Warmth, connection, practical room use |
| Luxury property | Refinement, restraint, exclusivity | Materials, symmetry, controlled light |
| Historic building | Memory, texture, craft | Patina, ornament, atmosphere |
| Apartment | Efficiency, compact design, city context | Layout clarity, light, versatility |
| Architectural portfolio project | Form, concept, spatial logic | Geometry, lines, relationships between volumes |
The best approach always depends on what the building is trying to communicate. When I photograph a luxury condo, I emphasize clean lines, high-end materials, and the view—often using a longer lens to compress the space and create a sense of exclusivity. For a historic home, I might use softer light and include more detail shots of worn surfaces to evoke a sense of time.
How this applies to real estate photography
In real estate work, the visual narrative still matters, but the goal is different. The images should help buyers understand the property quickly and imagine themselves there. This means the sequence must be clear, efficient, and emotionally resonant without feeling manipulative.
That means the sequence should be clear and efficient:
- Start with the strongest exterior or entry image. This is often the curb-appeal shot that sets the tone for the entire listing.
- Move through the most important living spaces in a logical order—typically from public to private zones.
- Include kitchen, primary bedroom, baths, and usable extras. These are the rooms buyers care about most.
- Add details only if they clarify value. A close-up of a chef’s range or a custom closet system can justify a higher price point.
- End with the feature most likely to create desire, such as a view, terrace, or fireplace. This leaves the buyer with a positive emotional imprint.
The story should feel accurate, not staged beyond recognition. Over-styling or misleading wide-angle shots may generate clicks, but they also lead to disappointed walk-throughs. I always aim for an honest representation that still highlights the property’s best self.
A practical workflow for stronger results
Here is a simple workflow you can use on nearly any shoot. I have refined it over years of working with agents and architects, and it consistently produces sets that feel cohesive and intentional.
- Read the space
- Notice the dominant light source. Is it a large south-facing window, a skylight, or a series of clerestory openings?
- Find the natural circulation path. Walk from the entrance to the main living area and note where you pause.
- Identify one dominant angle per room. This is usually the view that best captures the room’s function and relationship to adjacent spaces.
- Choose the narrative
- Decide what this building should feel like in one word: serene, vibrant, intimate, grand.
- Keep that word in mind for every framing decision. If the word is “serene,” avoid chaotic compositions or harsh shadows.
- Shoot for sequence
- Exterior
- Entry
- Main rooms
- Secondary spaces
- Details
- Final hero frame
- Edit for continuity
- Remove duplicates. If two images show the same information, keep the stronger one.
- Keep the lighting and color treatment consistent. A warm, golden living room next to a cool, blue kitchen can break the spell.
- Make sure each image pushes the story forward. Ask: “Does this reveal something new or deepen the mood?”
Why this approach works
People do not remember a property only because it was shown clearly. They remember how it felt to move through the images. That feeling comes from rhythm, light, and order. Neuroscience tells us that our brains process spatial sequences as narratives, filling in gaps and constructing a mental map. A well-structured photo set taps into that innate ability, making the viewer feel as though they have already visited the space.
When you create a visual narrative through a building, you are doing more than documenting architecture. You are translating space into experience. And in a market where buyers scroll through dozens of listings, an experience is what stops the thumb and sparks a showing request.
FAQ
What is the difference between architectural photography and visual storytelling?
Architectural photography documents the structure and design—it answers “what.” Visual storytelling uses those images in a sequence that creates meaning, mood, and flow—it answers “what it feels like.” A single architectural shot can be beautiful, but a narrative set makes the viewer understand the building as a lived experience.
How many photos does a visual narrative need?
There is no fixed number. It depends on the building, but the set should include enough images to show arrival, circulation, key rooms, details, and a strong ending. For a small apartment, 12–15 images might suffice; for a large estate, 25–30 could be necessary. The key is that every image earns its place.
Should every room be photographed?
No. Photograph the rooms and angles that support the story. A smaller, stronger set is usually better than a complete but repetitive one. I often skip a generic powder room or a hallway closet if they add nothing to the narrative. Buyers can see those during a showing; the photos should sell the dream, not the inventory.
What is the most important element in building storytelling?
Light and sequence matter most. Light creates mood, and sequence turns individual photos into a coherent experience. Even a modest room can feel extraordinary when lit with intention and placed correctly in the narrative flow.
Can small spaces still tell a strong story?
Yes. Small spaces often tell better stories because their details, proportions, and transitions are easier to control and emphasize. A tiny studio with a cleverly designed Murphy bed and a window seat can convey ingenuity and coziness more powerfully than a cavernous great room that feels impersonal.
Conclusion
A building becomes visually meaningful when you photograph it as a sequence rather than a collection of rooms. Define the core idea, use composition and light deliberately, include details that reveal character, and order the images so the viewer feels a beginning, middle, and end. That is what turns a property into a narrative—and what makes your work stand out in a sea of ordinary real estate photos.